When you crave something crispy on the outside and meltingly rich on the inside, nothing beats Chicken Kiev. This timeless dish combines tender, juicy chicken with a hidden core of garlic-parsley butter that oozes out the moment you cut into it. And while it may look like something straight from a fine-dining kitchen, we’re breaking it down for you—step by step—so you can nail it in your own home.
Whether you’re cooking for guests or just want to indulge yourself, this golden-crusted classic always impresses. From selecting the best cut to mastering the crumb and keeping that delicious garlic butter locked inside—this guide has you covered.
Table of Contents
Table of Contents
Why You’ll Love This Chicken Kiev Recipe
- Crispy & Golden: Panko-coated chicken that fries up perfectly golden every time.
- Rich Garlic Butter Filling: Melts into a luscious sauce when you cut into it.
- Elegant Yet Easy: Looks gourmet but uses everyday ingredients.
- Freezer-Friendly: Make ahead and store for future fancy dinners.
- Pure Comfort Food: Nostalgic, hearty, and seriously satisfying.
Unlike some recipes that lose their butter filling during cooking, our method ensures a tight seal and bold flavor. It’s perfect for impressing dinner guests or simply upgrading a quiet night at home.
Ingredients Needed
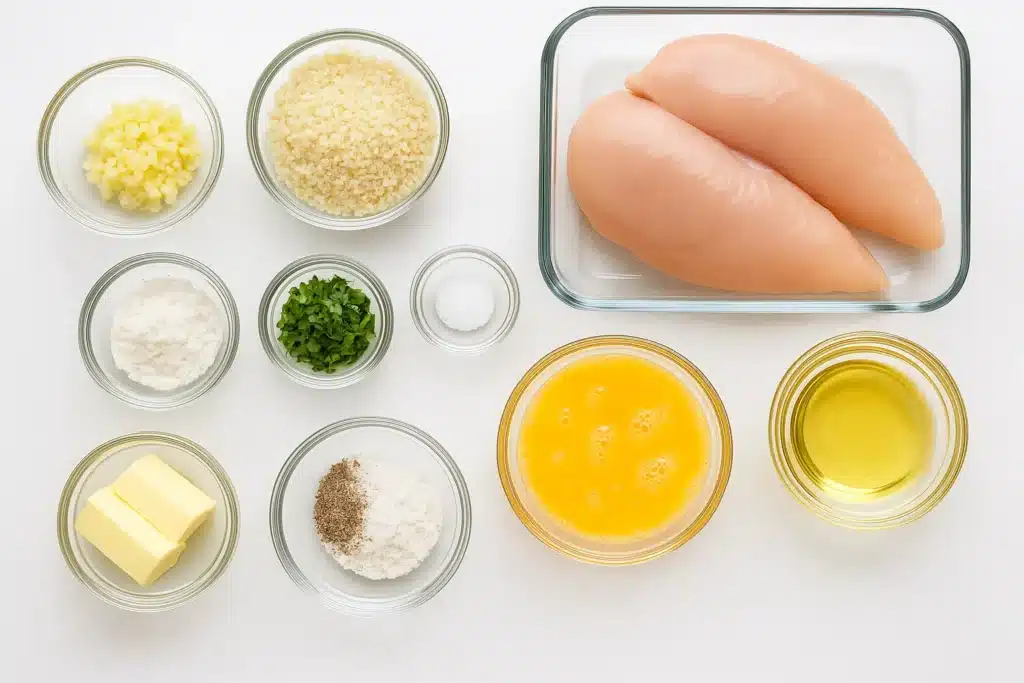
Let’s break this down into two simple components: the garlic herb butter and the chicken coating.
For the Garlic Butter Filling:
- Unsalted butter, softened to room temperature
- Fresh garlic, finely minced (for deep, aromatic flavor)
- Fresh flat-leaf parsley, finely chopped
- Salt, a pinch to balance the richness
For the Chicken:
- Boneless skinless chicken breasts – ideally large, to create a flat surface for rolling
- Salt and freshly cracked black pepper – for seasoning
- All-purpose flour – helps bind the crumb
- Eggs, beaten – for dipping the chicken
- Panko breadcrumbs – gives an airy, crunchier finish than regular crumbs
- Oil, for shallow frying – neutral oil like canola or sunflower
How to Make Chicken Kiev
1. Prepare the Garlic Butter
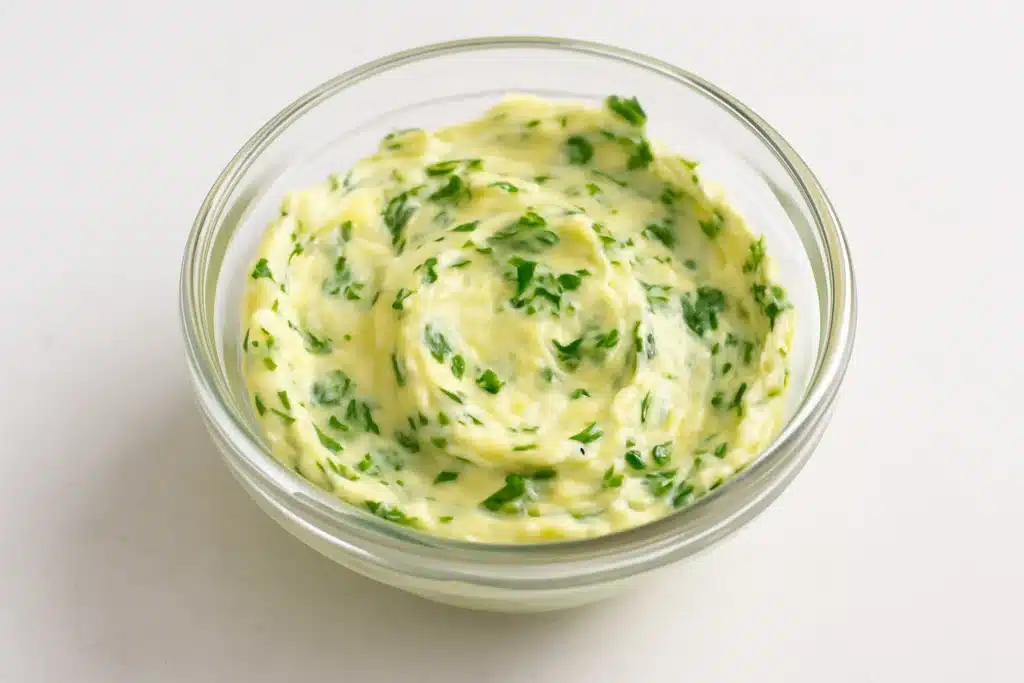
In a small bowl, mix the softened butter, minced garlic, salt, and chopped parsley until smooth and well combined.
2. Shape and Chill the Butter
Spoon the butter mixture onto a piece of parchment paper and shape it into a rectangle roughly 4 x 2.5 inches. Wrap and chill in the fridge until solid—this makes stuffing the chicken easier and cleaner.
3. Pound the Chicken Evenly
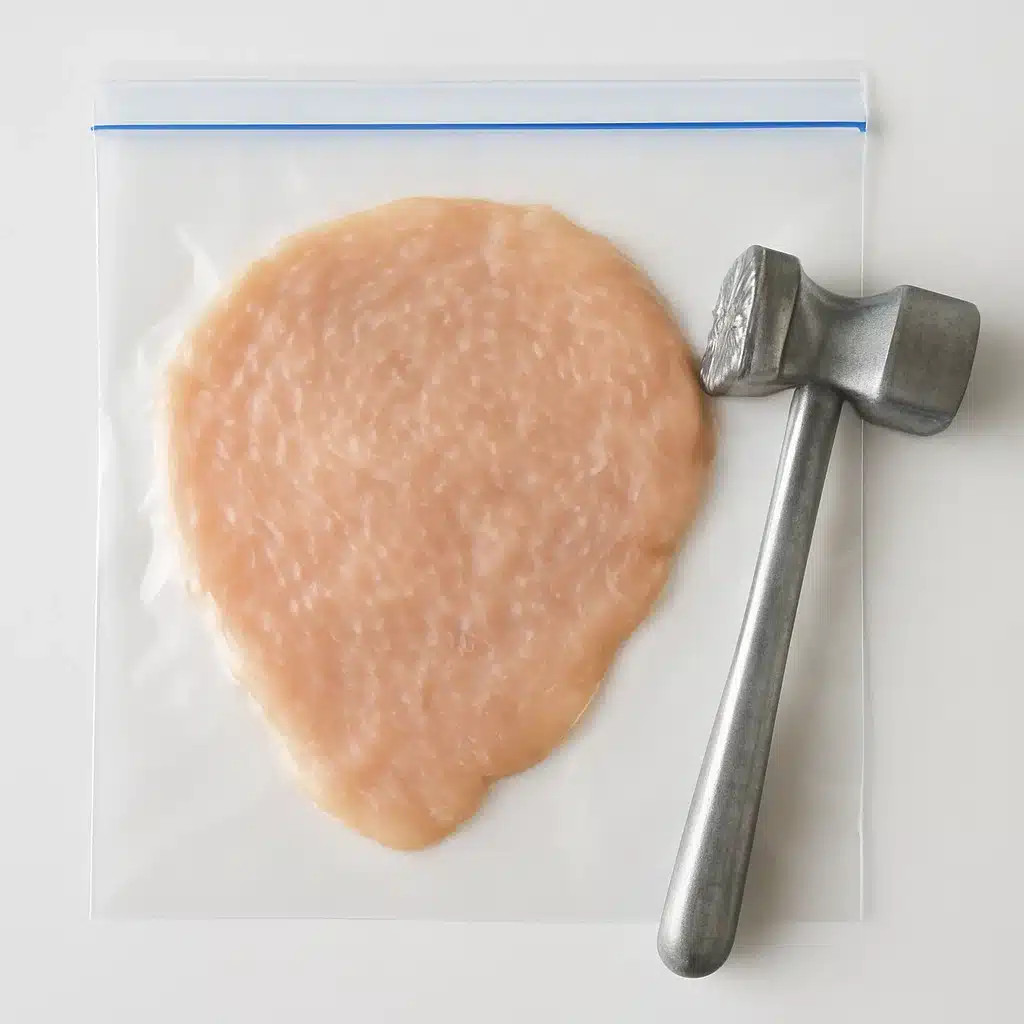
Place one chicken breast between two sheets of plastic wrap or inside a freezer bag. Use a meat mallet to pound it out to about 0.2 inches thick. Be sure it’s an even thickness to ensure even cooking.
4. Season the Chicken
Unwrap and sprinkle both sides of the chicken with salt and black pepper. This simple step builds flavor right from the start.
5. Add the Butter and Roll It Up
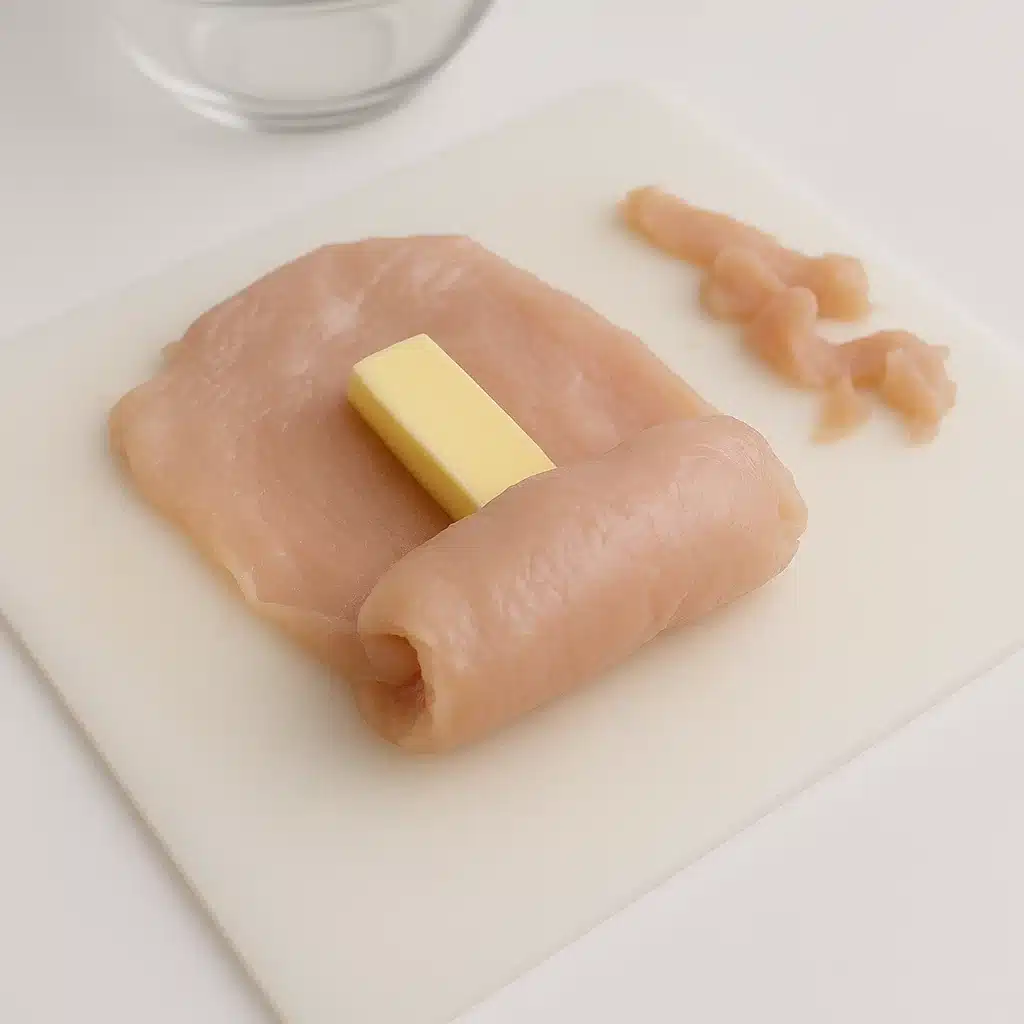
Cut the chilled butter into batons. Lay one baton in the center of the pounded chicken. Fold the sides inward, then roll tightly from the bottom up to seal the butter inside. Use trimmed bits of chicken if needed to patch any gaps.
6. Wrap and Freeze Briefly
Wrap each chicken roll tightly in plastic wrap to hold its shape. Chill in the freezer for about 30 minutes—this helps the butter stay firm during cooking.
7. Dredge and Crumb
Set up three shallow bowls: one with flour, one with beaten eggs, one with panko breadcrumbs. Unwrap the chicken, roll in flour (shake off excess), dip in egg, then coat fully in breadcrumbs.
8. Freeze Again (Optional but Helpful)
Chill the crumbed chicken in the freezer again for 20–30 minutes. This firms it up for frying and helps the crumb stay intact.
9. Fry to Golden Perfection
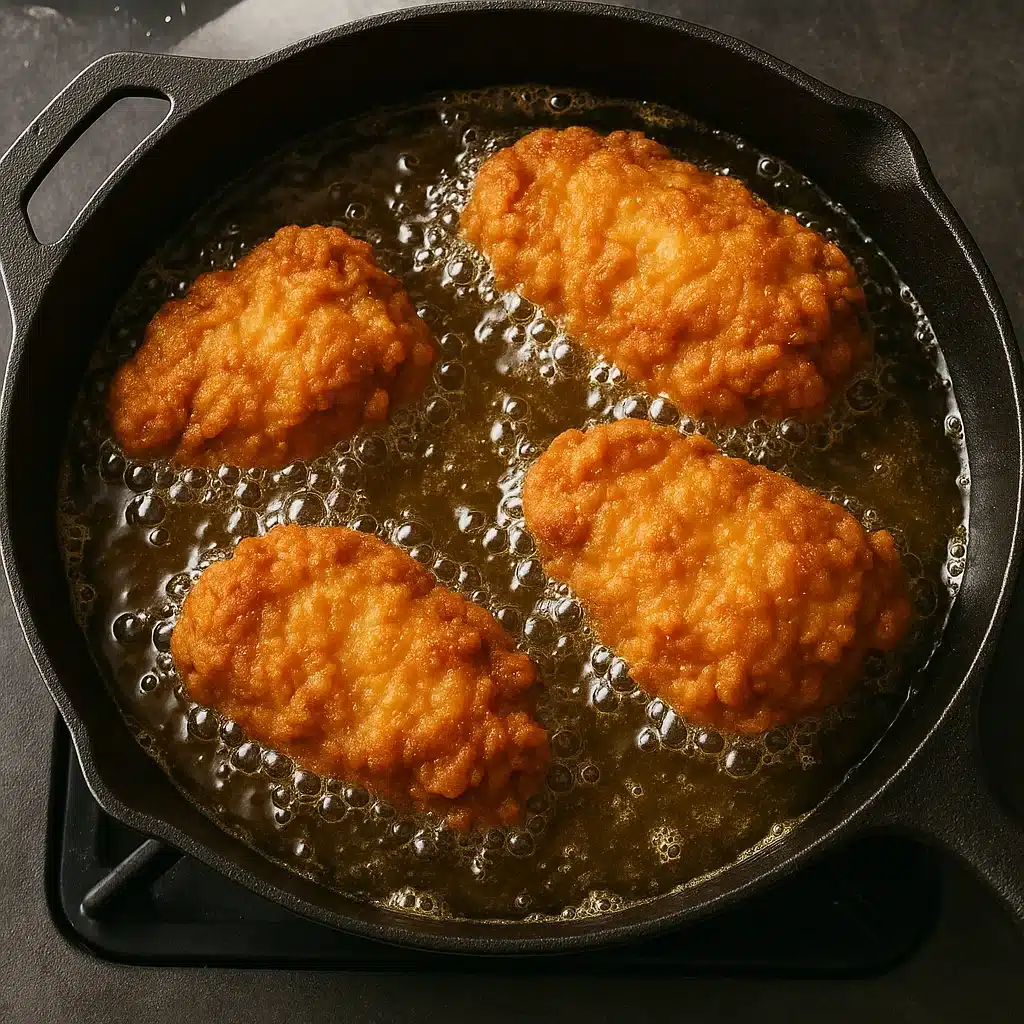
Preheat oil in a heavy skillet to 375°F. Carefully add the chicken and fry for 2–3 minutes per side until golden brown. You’re not fully cooking here—just getting that perfect crisp.
10. Finish in the Oven
Transfer the fried chicken to a rack over a baking tray. Bake at 350°F for 15 minutes, or until the center reaches 150°F internally. Tip: Pierce the top, not the sides, to check temp—avoids butter leaks.
11. Rest and Serve
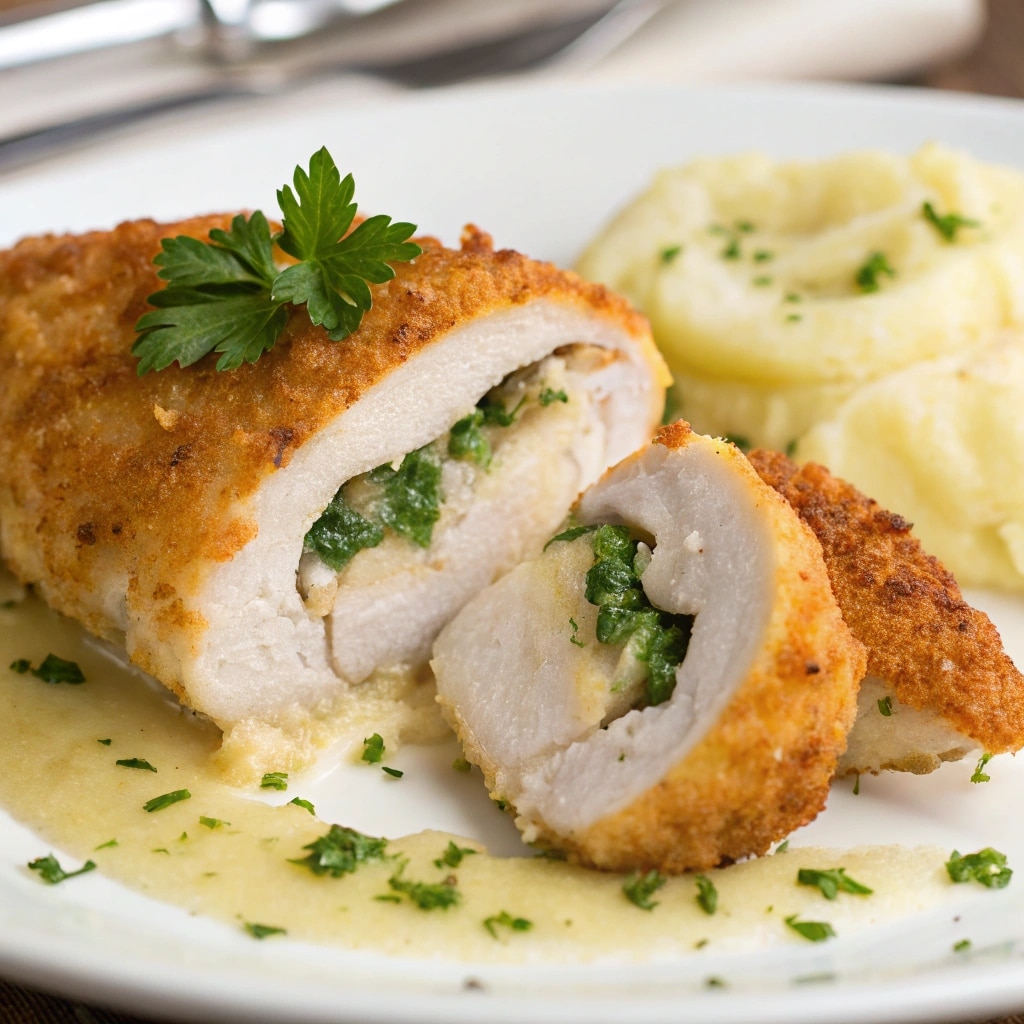
Let the Chicken Kiev rest for 2 minutes. Garnish with chopped parsley and serve immediately for that dramatic butter reveal.
Serving and Storage Tips
Serving Suggestions:
- Slice diagonally and serve over a bed of mashed potatoes or buttered noodles
- Add a squeeze of lemon or drizzle with a little herbed oil for a flavor boost
- Pair with roasted vegetables or a simple green salad
Storage & Reheating:
- Store: Leftovers can be refrigerated in an airtight container for up to 3 days
- Reheat: Reheat in the oven at 350°F until hot to maintain crispiness—avoid microwaving if possible
- Freeze: Wrap uncooked crumbed Kievs tightly and freeze up to 2 months; fry and bake directly from frozen (add a few more baking minutes)
Helpful Notes
- Butter Escape Prevention: Chill butter thoroughly and make sure chicken is sealed well before frying.
- Make It Ahead: Prep and crumb up to 24 hours ahead. Store in fridge or freeze until ready.
- Gluten-Free Option: Use gluten-free panko and flour substitutes—works just as well.
- Add Cheese: Mix a little shredded parmesan into the panko for an extra savory edge.
- Spice It Up: Try adding a dash of chili flakes or smoked paprika into the garlic butter for a twist.
Conclusion
This Chicken Kiev recipe brings together the best of both worlds—crunchy coating, tender chicken, and that irresistible garlic butter center. It’s comforting, impressive, and easier to pull off than you’d think. Whether you’re making it for a weeknight treat or a fancy weekend dinner, it’s bound to become a household favorite.
Tried it? Leave a comment and a star rating below! We’d love to hear how it turned out for you. Planning your own twist? Tell us—Did you add cheese? Swap the herbs? Share your version and tag us on social media.
Looking for inspiration? Try our creamy lemon chicken recipe or discover great ideas like Jalapeno popper stuffed chicken for more crunchy comfort.
Frequently Asked Questions (FAQ)
What is a traditional chicken in Kiev style?
Traditional Chicken Kiev features a breaded chicken cutlet wrapped around a cold herb butter center. When cooked, the butter melts and forms a rich, flavorful sauce inside.
What is the difference between Cordon Bleu and Chicken Kiev?
Chicken Kiev is stuffed with garlic herb butter, while Chicken Cordon Bleu is typically filled with ham and cheese. The techniques and flavor profiles differ significantly.
Why are they called Kievan chickens?
The name likely refers to its origin or popularization in Kiev, Ukraine. Some culinary historians debate its exact roots, but the name stuck due to its widespread association.
Is chicken Kiev raw?
No, Chicken Kiev should be fully cooked. While the outside is fried, it’s finished in the oven to ensure the interior (and especially the chicken around the butter) is fully done. The internal temperature should hit at least 150°F.

Chicken Kiev
Ingredients
Method
- Prepare the Garlic Butter
- In a small bowl, mix the softened butter, minced garlic, salt, and chopped parsley until smooth and well combined.
- Chicken Kiev
- Shape and Chill the Butter
- Spoon the butter mixture onto a piece of parchment paper and shape it into a rectangle roughly 4 x 2.5 inches. Wrap and chill in the fridge until solid—this makes stuffing the chicken easier and cleaner.
- Pound the Chicken Evenly
- Place one chicken breast between two sheets of plastic wrap or inside a freezer bag. Use a meat mallet to pound it out to about 0.2 inches thick. Be sure it’s an even thickness to ensure even cooking.
- Chicken Kiev
- Season the Chicken
- Unwrap and sprinkle both sides of the chicken with salt and black pepper. This simple step builds flavor right from the start.
- Add the Butter and Roll It Up
- Cut the chilled butter into batons. Lay one baton in the center of the pounded chicken. Fold the sides inward, then roll tightly from the bottom up to seal the butter inside. Use trimmed bits of chicken if needed to patch any gaps.
- Chicken Kiev
- Wrap and Freeze Briefly
- Wrap each chicken roll tightly in plastic wrap to hold its shape. Chill in the freezer for about 30 minutes—this helps the butter stay firm during cooking.
- Dredge and Crumb
- Set up three shallow bowls: one with flour, one with beaten eggs, one with panko breadcrumbs. Unwrap the chicken, roll in flour (shake off excess), dip in egg, then coat fully in breadcrumbs.
- Freeze Again (Optional but Helpful)
- Chill the crumbed chicken in the freezer again for 20–30 minutes. This firms it up for frying and helps the crumb stay intact.
- Fry to Golden Perfection
- Preheat oil in a heavy skillet to 375°F. Carefully add the chicken and fry for 2–3 minutes per side until golden brown. You’re not fully cooking here—just getting that perfect crisp.
- Chicken Kiev
- Finish in the Oven
- Transfer the fried chicken to a rack over a baking tray. Bake at 350°F for 15 minutes, or until the center reaches 150°F internally. Tip: Pierce the top, not the sides, to check temp—avoids butter leaks.
- Rest and Serve
- Let the Chicken Kiev rest for 2 minutes. Garnish with chopped parsley and serve immediately for that dramatic butter reveal.
